Tool API Tutorial
This document will walk you through converting your favourite JavaScript tool into a BlueGenes compatible tool. You may wish to keep the Tool API Specification open in another tab.
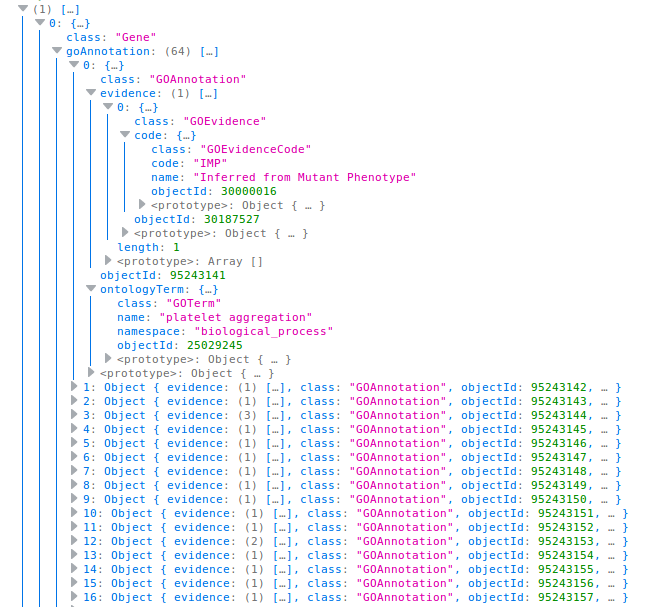
For this tutorial, we'll be creating a tool that fetches GO terms related to a single gene, broken down by namespace. Using the query builder and im-tables, we can generate the imjs query required, and we'll save it for later:
Getting ready#
What you'll need to build the tool:
- npm and node 7+, preferably installed via nvm.
- A JavaScript tool that you would like to implement in a BlueGenes report page.
- yeoman. you can install via
npm install -g yo. - A text editor and modern browser.
Optionally, to test your tool:
We'll expect a basic familiarity with programming - specifically JavaScript, LESS/CSS, and to a lesser degree, the DOM.
Generate your tool scaffold#
If you look at the Tool API Specification, you may notice that BlueGenes tools have a specific folder structure. The good news is that you don't have to create all these files yourself! We have a yeoman generator which makes things easier for you.
Install the Yeoman Generator#
Assuming you've installed yeoman already, run the following command to install the BlueGenes tool generator:
Brilliant! You'll only need to install the generator once.
Generate a new project: The wizard#
In the parent folder where you'd like your project to live, we need to make a new folder with your preferred name (perhaps something like ~/projects/myBluegenesTool), and then generate a new tool scaffold.
This will walk you through a few questions in a step-by-step wizard. We'll walk through what each one means now:
- What shall we name your project? This is a computer name with no spaces or special characters. - A name for your tool. We'd recommend prefixing every tool with the word bluegenesTool, e.g.
bluegenesToolProtVistaorbluegenesToolCytoscape. If you're not sure what you want to call your project yet, you could name itbluegenesToolGOTerms. - NPM package name? This is a computer name with no capital letters or special characters apart from the - dash - Something like
bluegenes-tool-go-termswould be perfect. - Thanks! Now, give me a human name for the project - e.g. "Protein Feature Viewer" - A nice friendly name for humans to read. Spaces are allowed. Let's call ours "GO Terms"
- Fabulous. Which report pages do you expect this tool to work for, e.g. "Gene" or "Protein"? Separate with commas and put * for all. - This needs to be an InterMine class or classes. Since GO stands for Gene Ontology, let's enter
Gene, to show this tool on all gene report pages. - Awesome. What type of InterMine data can you work with? - Right now, you have the choice between
id,idsor both. Selecting id means that the tool will be shown on the report page and passed the ID of the InterMine object (e.g., a protein might be represented by the ID 4815162342). For ids, the tool will be shown for list and query results and passed multiple IDs consisting of all the InterMine objects present. If you specify both, the tool will be shown in both circumstances and you'll need to ensure it can handle both single and multiple IDs. For this example, we will only specifyid. - Initialise with React and Babel? This will allow you to use React and ECMAScript 2015+ features. - You can select yes if you want a React and Babel boilerplate setup ready and wish to use ES2015+ features by editing the babel config later. Select no if you're planning to write vanilla JavaScript. Note that since BlueGenes already uses React, this won't increase the tool's bundle size, as the boilerplate will reuse React as provided by BlueGenes. This tutorial won't cover React, so let's select no.
- What's your name? - Hopefully you know the answer to this one! ;) This is important for package.json, which we will automatically generate for you.
- Your email - As above. It's useful for package.json.
- Your website - As above. It's useful for package.json.
- Which license do you want to use? - We've pre-provided a few licences to choose from. Whichever you choose, remember that InterMine is LGPL 2.1, meaning it can be taken into private repositories. This is not compatible with viral licences like GPL. For your tool, LGPL, MIT, or Apache might be good choices that are compatible with LGPL.
Once you select a licence, the yeoman installer should set up your repository and all the files within based on the responses you gave to the wizard. This may take a minute or two.
Setting up your newly scaffolded tool#
Take a few minutes to look through your newly generated tool files. We'll be doing most of our work in the src/index.js file, and previewing it via demo.html.
Fetching and formatting our data#
Open up src/index.js and take a quick look. There's a lot of dummy / example code that we can delete, but make sure not to delete the main method, export function main (el, service, imEntity, state, config). Instead, the code we write should be INSIDE this method (or called from inside it). This is the method that BlueGenes will automatically call when it loads your tool.
You can read more about the arguments for this method in the Tool API Specification. In this tutorial, we'll use these arguments:
serviceprovides the URL and token for communicating with a mine.imEntityprovides the details of the object(s) we're looking at (i.e., it might be that the tool is being passed the object ID of a gene).elis the ID of the HTML element we can attach any text / visualisations to.
Let's write some code. Remember the query we looked up earlier? We want to use imjs to load the query results and then display them on the page. Let's copy the query into index.js and print the results to the console to see if it works like we hoped.
Here's my first pass at index.js, deleting all the boilerplate and logging my query to the console:
Note the use of imEntity to form the query. You might be wondering where this data is coming from. It is passed automatically to your tool when BlueGenes loads it. Since we're just working in standalone mode at the minute, hop over to demo.html instead to see what's being passed over as arguments. You can tweak the getDataForTool function to make sure it reflects sample data you want to work with. You can also change the mine URL if needed.
In your terminal, you'll need to bundle your JS file. To do so, run npm run build. You should notice that we now have a folder called dist which contains the file bundle.js. How can we inspect to see if it is working or not? Well, we've included a handy little server for just this purpose! To test it out, run npm run dev and then navigate to http://localhost:3456. If everything went well, you should see a white screen, and your query results logged to the JavaScript console. Great! It should look roughly like this:
Making something display on the screen...#
White screens are boring. Let's output our results by iterating through them, sorting by namespace, and printing to the screen. In the demo below, we've used a quick and easy technique of building up the HTML using strings; we wouldn't recommend this for any large applications but for a small demo tool it's sufficient.
Here's the same code as before, but expanded to output the results visually in the HTML. In particular, note how we've set el.innerHTML = <someHTMLHere> - this is how we get our work to display in BlueGenes.
Goodness, that's ugly! Let's make it look a little nicer.#
Note: This section assumes some basic familiarity with CSS and LESS. You can use CSS frameworks like Bootstrap if you prefer (Bootstrap 3 is on the window), but you'll still need to follow this guide and namespace + compile your CSS.
Head over to src/style.less. You'll notice that there have been a few lines pre-populated on your behalf - it might look something like this:
Nest all your css inside the main code block, between the two curly brackets {} - this ensures that your css won't affect bluegenes or other tools by accident.
We've added a few minimal style rules here to show the GO terms in a column layout:
In order for the less to affect the page, we need to compile it into CSS. In your console, run:
Now, if you refresh your browser, you should see the new css applied! You can also look at your compiled CSS if you wish - it's in dist/style.css.
Releasing your tool and using it in BlueGenes#
At this point, you should have a basic functional tool that consumes InterMine data and looks nice when ran standalone. Well done! You'll probably want to test it in BlueGenes now, right?
- For tools under development, like this one, you should install your new tool into a local BlueGenes
- Once you have tested your tool in BlueGenes, you can make it available for others to install from the BlueGenes Tool Store page